30 June 2009

Chaos season... I mean canning season begins


Last year was my first ever canning year. I learned a lot, like patience, grasshopper, patience, also get it fast because the goods are going quick. I could kick myself for our laziness with cherries last year. Anyhow! Canning.

Our jam last year was runny, mostly because I didn't want to use TONS of sugar to make the jam "set" right. I found upon sleuthing Sure-Jell "pink" allows you to make jam using little to NO sugar! WOO HOO. Only the "no" sugar option is reserved for Splenda. YUCK! Regardless we were still able to use 1/2 the sugar the normal pectin calls for to "set" the jam.

Our reciepe:

8 cups of mashed strawberries
4 cups of (organic, fair trade, sugar)
1 package of Sure-jell pink box pectin
Sprinkle of Fruit Fresh (instead of lemon juice, helps the fruit stay color or keep from browning.)

From there we followed all the directions at Pick Your Own. This website has all the pictures and step by step instructions. We fudged on the recipe a little, it should be 6 cups of strawberries to 4 cups of sugar, but that was too sweet for us.

Which brings me to my most recent discovery. The Sure-Jell pectin from above is close to $3 per box. Which in the long run is expensive. So I tried to search out low to no sugar pectin in bulk. I discovered Pomona's Universal Pectin.

According to some forums I searched this is THE pectin to use. If you do a lot of canning (jam/jelly) this is the cheapest solution in the long run. It comes in 1 oz. 1/2 lb. and 1 lb. boxes. But here is the kick! It is so strong that 1 oz will make 2-4 batches of jam depending on the size batch of jam your making. The Sure-Jell (1 oz. package ) will make 1 batch of the above recipe. The only down side is you must weigh it out, because it is in bulk. It won't be an issue for me because I have a kitchen scale.

I bought some of the Pomona's Pectin for future batches of jam, I'll review it after I try it OK?


Our 36 lb. of Strawberries ended up in 15 pints of Jam and 18 lb. of vacuum sealed for freezer and future use. We plant to go back up and get more for right now eating and possibly more jam... gifts maybe?

29 June 2009

Strawberry Picking 2009


This year we utilized our lovely Green Bluff Growers again! Only decided to try Knapps Farm this year. They had a giant field of strawberries, which was good because we crawled all over it like ants to honey! They had 3 types growing, only two were ready to pick. I don't remember the names, and didn't care because hello? IT'S STRAWBERRIES!! AHHHH! Fruit is officially rolling in and I am stupidly excited about it.


We ended up with 36 glorious pounds of strawberries! It took us about 2 hours to pick as much but we were being really choosy.

25 June 2009

The Story of Stuff

I have been thinking about this little video for a while now and I think it deserves a post on the blog. This is called The Story of Stuff. It is about 30 minutes long, but worth it I promise!

21 June 2009

20 June 2009

Growing Rocks


As promised a picture of the rock pile we've collected. This is for just one raised bed. We pick axe, then use a pitchfork to lift out the rocks. Each bed takes us about 40 minutes to complete. The rock layer is in some spots only down 1 foot, easily reachable by most vegetables.

When we get done rock harvesting all the raised beds, I'll take a picture of the giant pile.

19 June 2009

Seaweed, Bioplastics, and corn in a car?


I saw this article the other day on MSN and wanted to post about it because it mentions the car I drive. The Toyota Prius hybrid. The picture is Toyotas 1/x hybrid, a concept vehicle made of bioplastics and seaweed.
Toyota's 1/x hybrid concept, whose bioplastic exterior contains seaweed, has the same interior space as a Prius, but weighs only 926 pounds - about one- third the weight of a Prius - and aims to double its fuel efficiency.

The article talks about different car manufacutres using more sustainable materials to make cars with. I thought it was a step in the right direction, making cars a bit more earth friendly in the long run.

Here's the article for further poking around. A Car Made Out of What?

The Last Beekeeper

A profound trailer and a difficult subject, we all want more time on this "little blue planet."


For the website click here.

17 June 2009

WB's weird chicken eggs

We have had a chicken laying really weird eggs lately. They went from fine to little to no shelled eggs in about a week. Doing some sleuthing trying to figure out which hen it is, we've come to the conclusion it's WB or white back our low ranking hen in the peck order.

WB took to laying her weird eggs in all sorts of places, the ramp up to the coop, in the grass run, or near the nest box but not inside it. Then I would have to get the cat litter scooper (what I use to clean the coop with) and lift the weird thing away so the other girls won't eat or trample it.


She seems has healthy as she's ever been, so I was at a loss to figure out why the soft eggs? Doing some poking around on Backyard Chickens forum page, I found that hens can lay weird eggs for a number of reasons. Mostly that she has some sort of illness, the list of afflictions was scary! However she is just fine, no coughing, drooping, or lack of appetite. But I did find that if a chicken suffers a fright it can cause her egg production to be really strange i.e. weird eggs, no eggs etc..

I had to think back to about 2 weeks now, WB got caught by the sprinklers that water the grass in the grass run. She was stuck next to the fence for 6 minutes while the sprinklers got the lawn. Our fence has about a 1 foot gap away from the grass that isn't watered, so she was never getting soaked, just unable to move much unless she wanted to get wet (which chickens HATE). That is the only thing I can come up with that would have frightened her into stupefaction. We nicknamed this chicken "fraidy" as in afraid of everything, so I am sure this has to be what startled her.

In order to remedy the situation the troops at Backyard Chickens advised to have more oyster shell on hand, and supplement with yogurt and a leafy green, like spinage. So I've done that for about 5 days now and the shells are getting more solid with each day. Yesterday she actually laid her egg in the nest box, I am sure feeling it was adequate for the box now. It was still a bit papery so we didn't eat it, but today her egg should be much better.

Any ideas would be appreciated. I'll keep you posted on the ongoing chicken saga.


16 June 2009

Before and After


July 4th weekend marks our "lets rip up our back yard" one year anniversary. This is also my 100th blog post. So I'll keep it easy just some before and after pictures, our quick year in review.


14 June 2009

Monarch Way station update


Last August I planted our Butterfly/Bee Garden in the front yard. All of the plants I got on discount because it was the end of flower season and they were looking pretty sad. I have added some plants to the list in that post. Namely milkweed, another lavender, a tiny start of a blue fescue grass, more creeping thyme for the walkway, and several random types of sedum.

Here's the updated pictures. It still looks pretty bare, but I plan to remedy that this year. I also want to expand the borders around my garden, which are currently harboring bark and a drip line tube, but nothing living.


12 June 2009

The other side of the garden

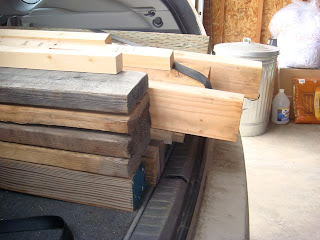
We've been debating on wether or not to use the "other side of the garden" for raised beds, fire pit, hammock swing, orchard or what ever? It came down to it that if all else fails and we don't truly need that much garden space we can always put in flowers. So we decided to build the beds a few weekends ago and get them placed. But before we could do that we had to level out the ground. I've driven the car on it, played on it, and the ground was generally rutted, pitfalled and hard as a brick!!


We fired up the rototiller and got to work. Making the ground lumpy and messy but at least workable. Jake came up with a wonderful idea to level out the ground. He got a pallet, placed rocks on it then drug it around the yard.

Here's a video to partake in the humor of it all.


Now the beds have been placed, spaced and ready to be filled. But first we are going to pickaxe the soil to get all the rocks out of it. ( I'll post some pictures of the on going rock pile drama. )


10 June 2009

Potato Idea

I was messing around on some blogs I follow and found this wonderful idea about potato planting from HomeGrown Evolution. But further poking round I found this step by step instructions and results on Build as you grow potato bins. This is essentially a square foot gardening method, but you build up not out.


I was unaware the reason behind "mounding" potatoes. In order to get a good harvest you mound the spuds to create more space between the top of the seed potato and the soil. This gap is where new potatoes grow. the taller the space the more spuds you get. I've heard people use old tires and when the potato gets as tall as the top of the tire, you add another tire and more dirt inside. This method is essentially the same thing.

When I planted the potatoes originally, I intended to mound them in the same raised bed with little thought about the why of mounding. But when I read the build as you grow article it states that the average yield is 10 pounds of potatoes per 1 pound of seed potato using the mounding or hilling method. This way however he got 25 pounds per 1 pound of seed potato. And he further states reports of up to 60 pounds!!!

I planted 2.5 pounds of seed potatoes, for each type of potato. Which means I could get up to 150 pounds of spuds!!!

This is what my raised bed looks like. I tried to show the height difference from the other raised bed in the foreground.


We opted to modify the bed we had since the potatoes were already growing when I discovered this. Jacob and I added a longer 2x4 in each corner so we could effectively raise the bed by 2 additional 2X6's. Giving us a raised bed that is 1 foot deeper 1.5' deep total. Next year we may decide to try and build it even higher and contain all the different potato varieties to one raised bed... but next spring is a long way off so we'll deal with that later.

08 June 2009

Fruit Trees and Blueberries

Just some quick pics about the fruit bearing tree/shrubs. All of them have been placed into the ground. The fruit trees in the front, with more room for 2 more (we are still deciding on what they will be) and the blueberries in the back yard next to the fence. We wanted to find a spot for them that would stay somewhat sheltered blueberries are notoriously difficult to grow where I am, we really want to make them stick around!

Tree's
In the front the cherry, behind and to the right the apple, and behind and to the left the peach (which is hard to see). 


Blueberries

There are 3 there.  From left to right Bluegold, Northland and another Bluegold.

06 June 2009

Freak show apple

I wanted to post a picture of our 'science experiment' apple tree. See all the tags on it, each of them represent a graft. Each graft equalling a different type of apple tree. All of these are grafted onto a dwarf root stock, thus making the apple a dwarf freak show. I can't wait, it should produce yellow, red/green, and red fruit all on the same tree. 

The trees we planted last week are doing good, the apple and cherry are both leafing out and showing signs of progress. The peach however is looking kinda sad. I think when it was removed from it's original location and shipped to me somewhere along the way one of it's main roots was broken. I am fairly certain it will survive but struggle this first year. 

I have tons to post but little time to do it, but I promise I'll get it up here.

04 June 2009

Can I get a clone?

OH my gosh busy! So I am going to be a cruel blogger and give you a list and no pictures. Only because I don't have them all off the camera or sized or anything! We built a solar dehydrator (plans, videos, pictures to come), 8 more raised beds, leveled off the ground, raised the potato bed into a genius idea ( of course I will share), dug three holes and planted all the fruit trees, dug 3 more holes for the blueberry bushes (decided they should be in the ground). Then we refigured the drip system and put into place the first stage of our watering plan!

AHHHHHH


Sorry I totally haven't been around much but YIKES! Much planing and construction work is going into this garden long before any plants are. They better appreciate all this work and put out some good veggies!