16 May 2009

The Furminator


Sometimes when you find a new product and it is really awesome, one just has to write about it. 

The Furminator by all accounts lives up to it's name. I was skeptical of this "miracle" brush to say the least and I was also put off by it's $40 price tag in the store. I will say I got sucked into watching the videos when I was at Aslin Finch the other day. I thought no way! My short haired mutt Kai sheds so damn much we call her the fur factory. I have given up being anything but covered in dog hair, no matter how hard I might try.  But this brush according to many reviews on amazon and many videos seemed to be just the "miracle" it claimed to be. 

I decided to give it ago, having decided maybe we could sell coats or possibly learn to weave dog hair into more fashionable clothing if we could get it off of her in chunks.

I purchased the Furminator from Amazon. At exactly half the cost. I still thought $20 was too much to spend on a brush... but if it made my comforter cease looking like a polar bear pelt it would be worth it!

I am happy to report that it is worth it! Stupid amounts of fir came off of Kai, holy cow! Sadly I don't have any pictures of the stupid giant pile! I do however have a video.... from Jacob's perspective (keep in mind we had been celebrating mother's day with lots of beer, wine, and mom's favorite brandy, we are weird to begin with.... but...)

Here goes, the pile is giant, two good handfuls. I have brushed her again since then and proceeded to get at least one more handful from her. I could probably brush her every day and get the same song and dance. 


15 May 2009

Caping off Existing Sprinklers

For the sprinkler zone we have converted into garden use there were only 2 sprinkler heads that needed to be removed. Well we didn't want to dig up the piping so we opted to just cap them off. This way when we turn on the garden zone these two sprinklers won't turn on and water the dirt. 

For previous faucet/sprinkler conversions click here.

Here we go, dig out the faucet head you wish to remove.

Be careful not to get any dirt in the tube because this can clog the pipe line.
Parts you need: 6" or greater riser (the grey part) it just depends on how high out of the ground you want this to stick. We went with at ground level. A double 3/4" threaded coupling and a 3/4" threaded cap.

Make sure to use teflon tape to get a nice good seal and put all the parts together. 

Teflon tape the pipe in the ground for a good leak free seal.
Install, screw on, place, add or any other word you would care to use just hook it together.
Now go and turn the sprinkler zone on... does it leak? Nope, of course not because you used teflon tape and created a nice good seal. Now bury it!

Replace the grass so all you see is a nice white cap. Mean while the chickens, expecting worms since you did dig into ground after all... pace back and forth awaiting there snack.

Voila! 

We have ordered a bunch of stuff for the garden hose conversion... but we have family coming in this weekend so I doubt we will get to that.

Stay tuned...

13 May 2009

Radiant Heat Insulation

This was actually a very hard project to take pictures of. Getting the scope and angle of the garage is often difficult. So here goes.... We decided LAST May to install Radiant Guard heat insulation to our attic. Several sheets of that later, and the tempurature spiked along with impeding shoulder surgeries.... lets just say we didn't get anymore done. So Jacob and I decided to do the garage since that was an easier task due to the fact that there is no other insulation to deal with! 

The Radiant Guard we purchased from ebay is here.

The naked garage before.


We hung the roll of radiant barrier (RB) from a stick so we could unroll it easier. We measured out the length of the garage plus a few inches of oops room. Then used a board and a box cutter to get a "straight" cut. 


Up in the rafters before setting the RB. Trying to get is straight. You must leave 3 inches on the bottom of the rafter and 3 inches on the top, this helps the hot air move toward the vents in roof. 
This is the close up view of the gable wall. By that I mean the ends of the garage or the wall with the actual garage door in it = gable wall.  We left about 3 inches of RB on the sides in order to tape that down later. 

Now here is where it gets tricky installing the second piece. See the lower half is already stapled in place. It looks like there is a giant gap in the RB. Well we had to go around some of the wood trusses that support the roof. In order to do this you must measure the top half and staple it then work your way down to join the other sheet of RB. 


See this is the wood we had to go around. The top half of the picture is towards the roof of the garage and the lower half is towards the other sheet of RB. 

Another close up of that wood we had to go around. This was for every wood truss on both sides of the garage. It made for slow going of the install.

This is the view after the second piece has been done and finished with stapling. 

Another angle of the same side. Like I said it is hard to get the scope and angle of the picture taking. 


A quick video for I hope a better explanation and maybe better view. 


We added a third small strip to bring the RB about 3 inches away from the peak of the roof. 

Then I purchased on ebay a roll of  aluminum tape. Just like this.
The tape seals all the seams and edges. You could use duct tape but our garage in the summer gets really hot and duct tape would melt. This aluminum tape is rated to like 150* so it should with stand the heat. 

On a side note, the RB is really thick like construction paper, it isn't like aluminum foil that is flimsy and can tear, this stuff you can roll up and stretch (with in reason) and it won't break, so it is rather easy to handle during an install. 

The reason we did this... that is best explained by the Radiant Guard's description.

"Start lowering your heating and cooling costs by up to 40% by installing this double-sided 99.5% pure aluminum foil radiant barrier to BLOCK 97% of the radiant heat coming into your house through the roof during the summer and RETAIN the heat escaping out of your house through the roof during the winter."

Here's hoping it works!

12 May 2009

The first bee tenant

I noticed we have our first mason bee tenant. I went out today and there is a second one covered in mud as well. Mason bees, cover the opening with mud to seal the larva inside.

Nature at its best.


08 May 2009

Coffee Break


We've been very busy! I know with the impending spring almost everyone else has too. I just thought I would offer up a coffee break. 

05 May 2009

Constructing the Arbor Part 3 (Final)

Here's the link to Constructing the Arbor Part 1 and Constructing the Arbor Part 2

Now on with the story.

The next step of the project was making the vertical 2"x2"s for the sides of the arbor. The design in the book had four vertical boards but Jen and I decided that five looked better. We just leaned the boards up against the cross-braces to see what it looked like first. The vertical boards require measuring from the top of the top cross-brace to the bottom of the bottom cross-brace. Next, I used the miter saw to cut 10 2"x2"s to length. While I did this, I had the thought of putting dowels horizontally through the vertical 2"x2"s. I thought they would be a good for the grape vine to have something horizontal to grab onto as it grew up the side of the arbor. So Jen and I decided to put in three on each side. So we made a quick run to the local hardware store and got six 3/8" x 48" wooden dowels. I measured the inside distance between the two posts and cut them about 2 inches short of that length to the give the dowels about a one inch gap from the post on each side.  Then I measured from the bottom of the top cross-brace to the top of the bottom cross-brace. I divided the length of the 2"x2" by four to get my measurement for the even spacing of the dowels. I marked the 2"x2" with pencil and drilled the holes in the 2"x2"s with my drill bit that's one size up from 3/8". I made a test hole in a scrap piece of wood with a 3/8" drill bit and I could not get the dowel through so that's why I went one size up and it fit snug. So after I got done drilling the holes (wishing I had a drill press so I could get the holes perfectly straight) in the 2"x2"s, I put the dowels through and then took the whole thing as one unit and attached it to the arbor one board at a time.
I first measured the distance between the two posts on the side, divided that value by 6, and then marked the cross-braces. Each mark in the center point for one vertical 2"x2". Jen helped me out by holding the boards while I screwed them into the cross-braces like so...

So here's the what it looks like after completing one side.
So the final step in the arbor process was the 2"x2"s that go on the top. I placed a couple of them on to see if wanted to cut them down. We decided they looked fine at the full 8' length. After this, I thought we could cut the pattern in the top boards the same as we did for the two top beams. I tested it out on scrap board and it worked great. So  we made the following marks on each board and cut them out with the jig saw.I thought this added a nice touch. I then marked the center of each of the 2"x2"s on the bottom side for centering when placed on the top of the arbor. I measured the center point on the top cross-brace on each side and ran a fishing line between the two top cross-braces. I lined up the center line on the bottom of the 2"x2"s with the fishing line. This centered the board on the top of the arbor. 
Now, I needed to mark the top beams so I could place the eight 2"x2"s evenly spaced apart. To do this, I measured the length of the top beam, divided the number by 9 (I'm using the number 9 because there are nine spaces between 8 boards and this will get the spacing even), and marked the top beams on both sides with the first mark being that distance in from the end of the beam. I placed the first beam on top of the arbor, centered it with the fishing line, lined the sides up with the mark on the beam on both sides and then screwed the 2"x2" in place. 
So here's what they looked like all screwed into place.So here are a couple of views of the finished arbor. YEAH!!!!


Please feel free to ask any questions. I'm happy to help!

03 May 2009

Constructing the Arbor Part 2

Here's the link to Constructing the Arbor Part 1

Okay, here we go again : ) I left off last at finishing the notches on the posts.

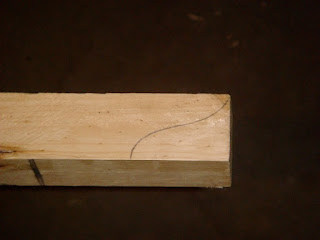
Jen got a piece of plain white paper and drew a design for the ends of the top beams. We cut the design out and traced it with a pencil on both ends of both beams.
After that was done, I used the jig (saber) saw to cut the design out. I took it really slow I didn't break the bit, especially around the tighter curves. Check out those awesome safety glasses! ;-)

Here's the finished beam.

Now I took the finished two beams and attached them to the posts. First, I measured and marked the top of both beams at their center point. Then I measured the inside distance between the posts and divided it in half to find the center measurement. Jen helped me put the first beam on the posts and center it up. Then I drilled 2 holes all the way through the beam and post for the 5" carriage bolts to attach the beam to the posts. Finally, I put the bolts in and fastened them down with the nuts and washers. As you can see in the picture, I offset the bolts because on the right side of the post in this picture is where I will be attaching the top cross brace with the lag screws. I didn't want them to run into the carriage bolts.


So here's how things are looking at this stage. This gives the best perspective of the proper orientation of the notches that were cut to accommodate the beams.

Now it's time to attach the bottom and top cross braces. Okay, I forgot to take a picture of just the cross braces being attached so here's a picture ahead of schedule to give a good perspective of the cross braces. So measure to the outside edges of the posts for the bottom brace and the inside edge of the beam for the top brace. My posts were set slightly less that 4' apart so I could get 2 braces out of a 8' 2x6.

Here's a close up of the top and bottom braces. I put the bottom cross brace around a foot off the ground. I just did what I though looked good. I drilled guide holes on each side for the lag screws. Again, I drilled the guide holes so the lag screws wouldn't break while screwing them in. Also, make sure you use a drill bit that's smaller than the lag screw. You want to make sure that the lag screw still has wood to bite into. Don't forget the washers.


Next post I'll continue on with the vertical 2x2's that will attach the cross braces and the last minute idea I had concerning the dowels. 

Good day and remember, safety first!

02 May 2009

Potato Planting

When I got my planting potatoes from Seed Savers Exchange, I was expecting them to come already growing. No such luck, so they had to sit out for about 2+ weeks to start growing before I could plant them. So I am a little bit behind on the potato front.  I will remember to order the potatoes a bit earlier next year ( unless I can save some of my own....).

Potato types:

German Butterball
Rose Finn Apple

The garden book I love called The Vegetable Gardener's Bible says that each potato should be about the size of or slightly larger than a golf ball. If they are bigger you must cut them and let it heal over for a few days before you plant. Well all my planting potatoes were the perfect size so I didn't have to cut any of them. The garden book suggests you give each potato a light dusting of agriculture sulfur. This wards off fungus diseases and potato beetles.

Here we go...

I set up two rows about 1.5 feet apart from each other and 3 inches deep. Ready for the potatoes.

Growing potatoes on a plate?


The Rose Finn Apples in a sulfur bath. In a paper bag I placed about a handful of the sulfur and then shook the potatoes around in it.  The handful covered all the potatoes I had to plant, it is only a dusting. 

Rose Finn's ready for bed!  Place each potato about 1 foot apart. 

German Butterballs in the same boat.


Ta Da! The two completed beds ready for watering.


01 May 2009